


Spaceport Guide

This guide is for those already running Autonomys on Docker. I will have another guide that basically covers start to finish for running Autonomys + Spaceport. I will also have an advanced guide that goes over how to build your own images if you wish to customize some of the settings.
Prerequisites:
Autonomys running in Docker
All of the Autonomys containers must be able to reach where ever you deploy Cosmos (to send events to the API).
That is really it. This is not that complex. There are three containers we will deploy:
Cosmos
MySQL
Hubble (on each computer)
Hubble will need to be deployed on every server that you have Autonomys containers, as this is what connects to your containers and scrapes/monitors them.
Creating the Docker Network
MySQL uses a fixed URL for the database location. It is baked in the build that occurs when creating the Docker image. For this reason Cosmos and the MySQL instance must run on a named network in Docker so we can control the IP. If you are unable to do this, you must build your own Cosmos Docker image so you can customize the URL, this will be covered in the "Advanced" guide.
To create the Docker network run:
docker network create \
  --driver bridge \
  --subnet 172.99.0.0/16 \
  --gateway 172.99.0.1 \
  spaceport-network
This will create a network called “spaceport-network” which has the correct subnet.
Now we can set up the stack/docker-compose that will run Cosmos and MySQL. Open up Portainer and add a new stack (I call it spaceport-cosmos), then paste this into the web editor:
services:
  cosmos:
    container_name: spaceport-cosmos
    image: hakehardware/spaceport-cosmos:0.0.2-hotfix
    restart: unless-stopped
    ports:
      - "9955:3000"
    environment:
      - TZ=America/Phoenix
    networks:
      spaceport-network:
        ipv4_address: 172.99.0.100
    command: sh -c "npx prisma migrate deploy && node server.js"
    depends_on:
      mysql:
        condition: service_healthy

  mysql:
    container_name: spaceport-mysql
    image: mysql:8.0
    restart: unless-stopped
    ports:
      - "3306:3306"
    environment:
      MYSQL_ROOT_PASSWORD: password
      MYSQL_DATABASE: spaceport
      MYSQL_USER: user
      MYSQL_PASSWORD: password
    volumes:
      - mysql_data:/var/lib/mysql
    networks:
      spaceport-network:
        ipv4_address: 172.99.0.101
    healthcheck:
      test: ["CMD-SHELL", "mysqladmin ping -h localhost -u root --password=password || exit 1"]
      interval: 10s
      timeout: 5s
      retries: 5
      start_period: 30s

volumes:
  mysql_data:

networks:
  spaceport-network:
    external: true
It might seem like there is a lot going on here but there really is not. We are just deploying Cosmos on IP 172.99.0.100 with port 9955. Then we deploy a MySQL isnstance with a database called “spaceport” which we will create the tables in. The Cosmos container checks for the MySQL container to be healthy, then runs the database migration scripts to ensure your database has the right schema. This all happens automatically. Then Cosmos starts the front end and BOOM you have a website.
NOT: You should not modify the container at all unless you know exactly what you are doing. Most of these settings are built into the image and it will break if you change them. If you are worried about just using “password” as password, please check out the advanced guide which will cover how you can change settings in this docker-compose file.
To check it out, you need to navigate to the URL where it is deployed. For me, my URL is http://192.168.69.12:9955/ (do not forget the port) as this is the IP of the host running Docker. You can run Cosmos anywhere that your Autonomys deployment can reach.
The next step is to deploy Hubble, which will go back and parse all of your logs and turn them into Events, which are then sent to Cosmos and stored in the database. When Hubble starts, it looks for the oldest Event in the database for each container, and only gets Events after that time. This prevents Hubble from trying to add duplicate Events. For new deployments, Hubble will need to parse ALL of your logs and this could be 1000s of events. I have not optimized this to perform batched inserts, so it can take a few minutes before Cosmos has the most recent events, let it run for a bit and you should see the front end updating.
Let's deploy Hubble. This is much easier. You will need to deploy a single instance of Hubble on each host. It will automatically detect your containers and start parsing them. I prefer to create a separate stack file even if it is being run on the same PC as Cosmos:
services:
  hubble:
    container_name: spaceport-hubble
    image: hakehardware/spaceport-hubble:0.0.2-hotfix2
    restart: unless-stopped
    environment:
      - TZ=America/Phoenix
    command: ["python", "main.py", "--api_base_url", "http://192.168.69.12:9955"]
    volumes:
      - /var/run/docker.sock:/var/run/docker.sock
    network_mode: host
Make sure to update the --api_base_url to match the URL of your Cosmos instance. As you can see this matches the URL I posted earlier. This will be the base URL Hubble uses to send API requests to Cosmos
Once you deploy the docker compose it will begin to push events to Cosmos. That's it. When new versions are released you only need to update the image version (unless additional instructions are provided). Certain updates will require both Hubble and Cosmos to be on minimum versions, which will be described in the updates.
Typically for an update you should shutdown Hubble and Cosmos, then deploy Cosmos first which will perform any migrations, then deploy Hubble.
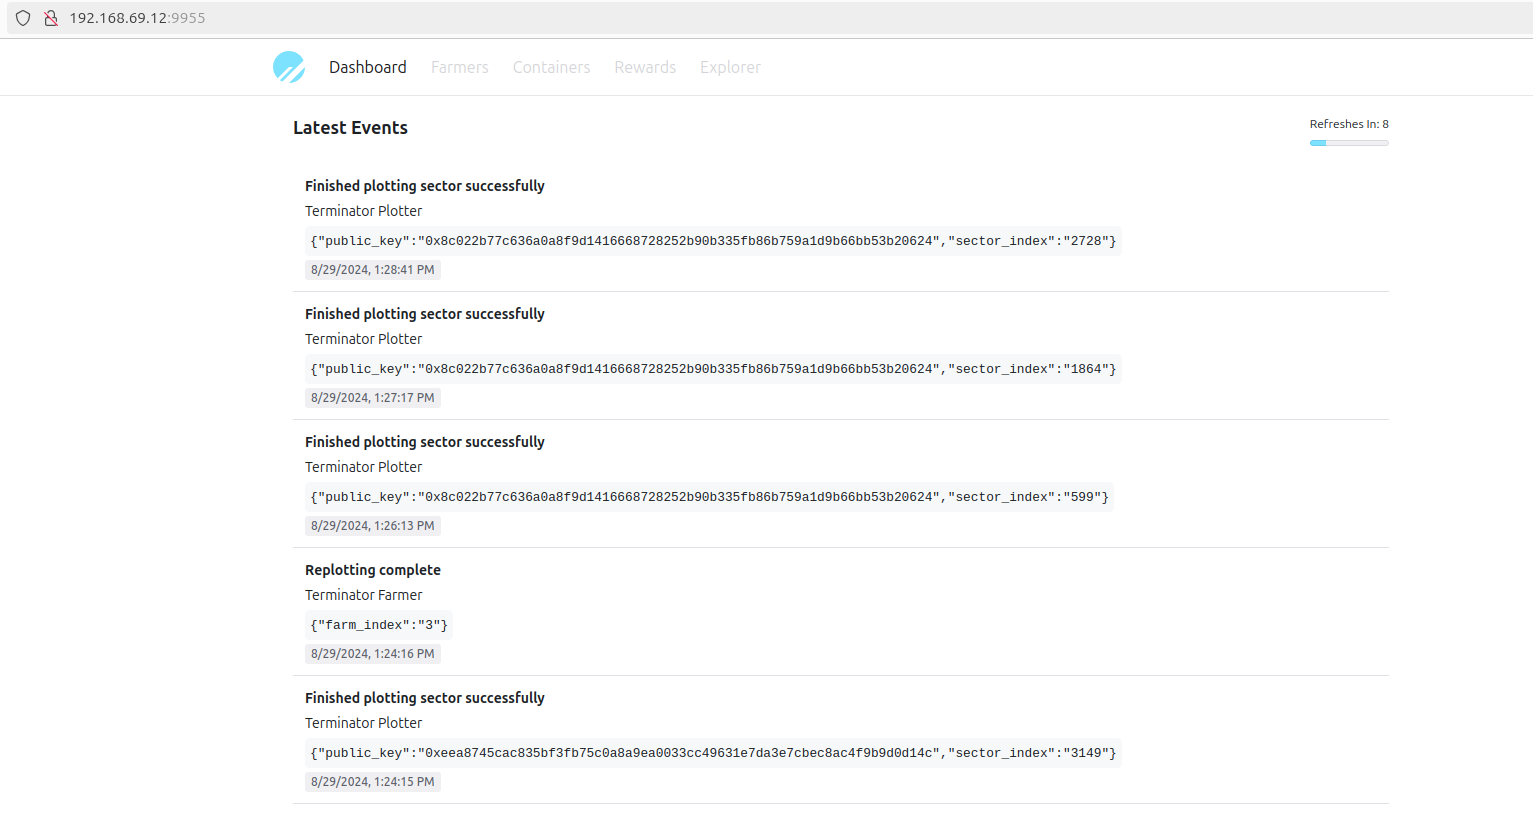
The features are light - it literally just shows you the last 5 evernts. But I have a TON of cool features planned. I’ll be working on the dashboard first, which will be a glance view of everything going on in your Autonomys ecosystem. Then I’ll start digging into granular data and state about everything. I promise you this will be VERY useful. Stay tuned!